Guia do mapa de Farm Arrays em Rain World: rotas, abrigos e Worm Grass
Um plano prático para ler o mapa de Farm Arrays, proteger seu ciclo e decidir quando vale a pena atravessar a região.

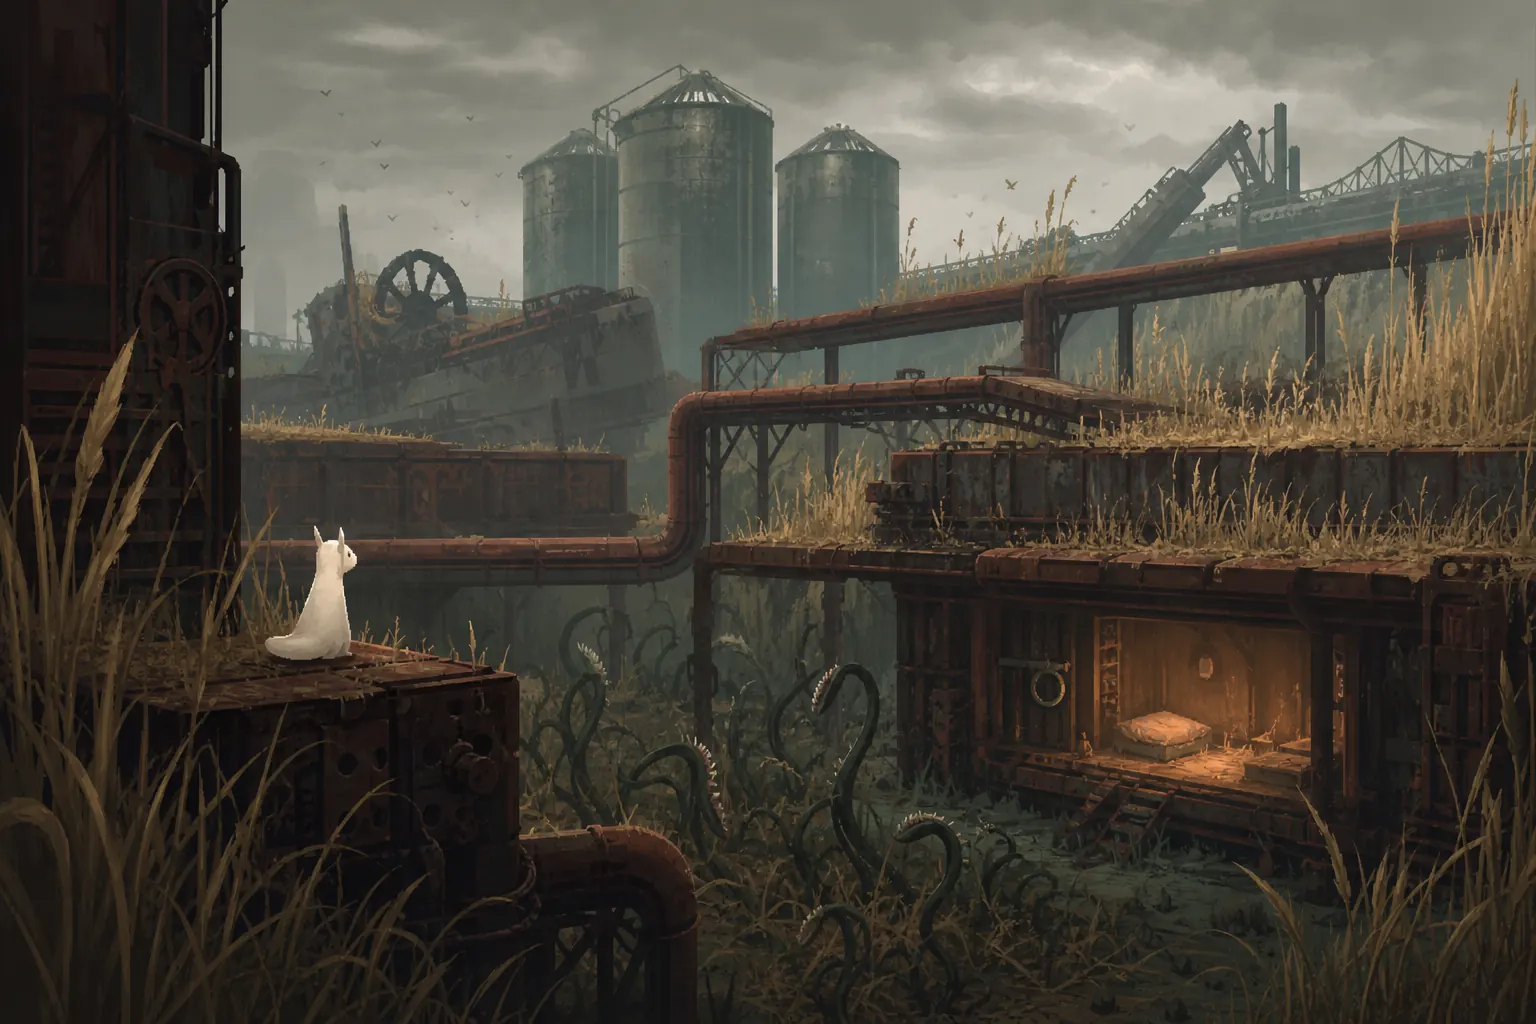
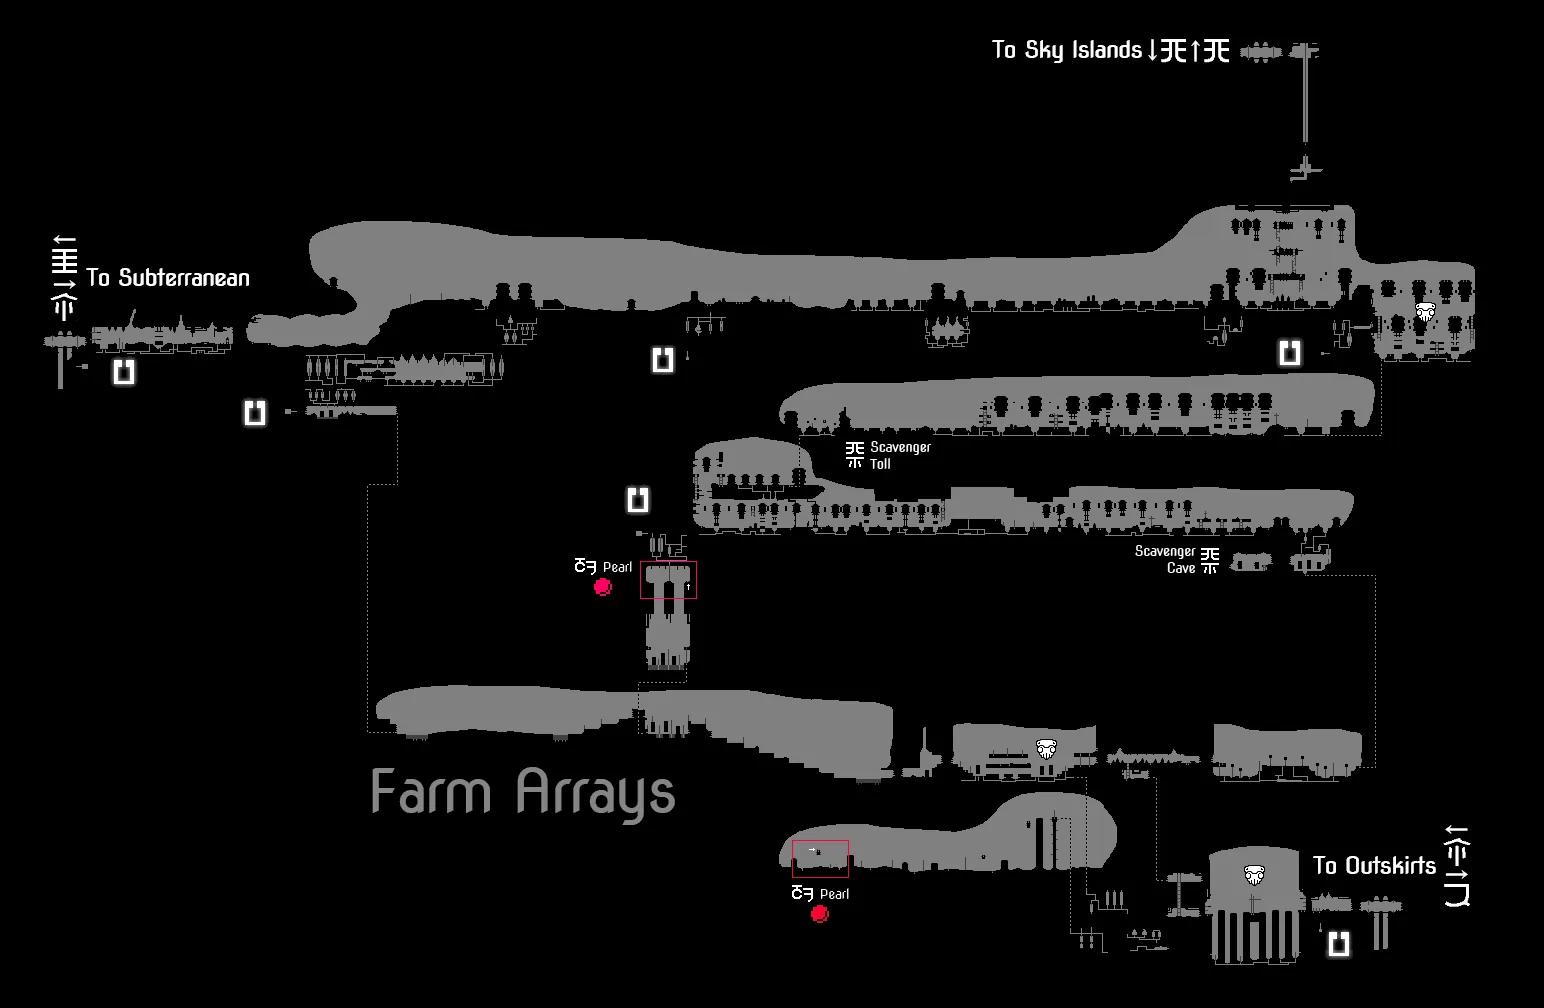
O mapa de Farm Arrays em Rain World serve menos para encontrar uma linha perfeita e mais para controlar sua exposição. A região distribui os caminhos entre plataformas longas, espaços abertos, grama alta, abrigos e perigos que punem decisões tardias. Se você quer saber onde Farm Arrays fica, como chegar a partir de Sky Islands ou Outskirts, ou se vale a pena atravessar a região na sua campanha, comece pela sequência de abrigos e pela saída de que realmente precisa.
Resposta rápida: a forma mais segura de chegar a Farm Arrays
For a first visit, enter Farm Arrays early in the cycle and treat the first reachable shelter as the anchor for the entire region. Do not begin by crossing the widest grass field or chasing a distant landmark. Confirm which side of the map you entered from, locate the next shelter, and choose one exit before spending food or time on optional rooms.
The practical route is usually a controlled shelter-to-shelter push: enter, recover your bearings, cross only the hazard that blocks the next shelter, then stop exploring once the exit direction is clear. If a route depends on a perfect Raindeer ride, keep a slower fallback in mind. A path that is slightly longer but keeps you above Worm Grass is often safer than a direct line through the middle of the region.
Farm Arrays is a good example of why a full map and a route guide serve different jobs. The map tells you where a connection exists; the guide helps you decide whether the connection is sensible with your current cycle, food, karma, and campaign.
Padrão de rota para iniciantes
Entrada → abrigo mais próximo → sequência de plataformas seguras → uma saída → parar de explorar
Enter early
The region has open crossings and long recovery distances. Arrive with enough cycle time to retreat instead of starting at the warning.
Mark the next shelter
A shelter is more useful than a distant collectible when you are learning the route.
Choose one exit
Decide whether you are returning, continuing toward Sky Islands, or taking a deeper connection before you cross the center.
Keep a fallback
If a Raindeer or grass crossing fails, retreat to the last known platform rather than improvising through the lowest route.
Entradas, saídas e regiões próximas de Farm Arrays
The most important map question is not simply where Farm Arrays is, but which connection matches your reason for entering. The Sky Islands side can turn the trip into a long vertical or exposed approach. The Outskirts side is easier to understand as a return or early-route anchor. Other exits can point toward deeper routes, but the exact usefulness depends on the active campaign layer and the map version you are reading.
Before leaving a shelter, use the map to answer three questions: which transition is closest, which shelter protects that transition, and which route remains if the first crossing fails? This prevents the common mistake of walking toward a visible landmark and discovering that the useful gate is on another platform level.
If you are following the broad Survivor or Monk route, compare Farm Arrays with the global region order in the Progression Guide. If you are using a Downpour slugcat, select the campaign-specific layer first; do not assume a route learned on Survivor has the same creature pressure or purpose.
| Connection | Useful when | Main risk | Map check |
|---|---|---|---|
| Sky Islands | You are continuing an upper-region route or checking a high-side entrance | Long exposed crossings and a difficult return | Mark the last shelter before entering the upper platforms. |
| Outskirts | You are returning to a known early region or setting up a safer loop | Assuming the visible exit is the closest safe route | Check the gate direction and the shelter on the same platform chain. |
| Subterranean-side route | You have a deliberate deeper objective and the correct campaign layer | Entering a commitment route without enough cycle margin | Verify the exact transition and a fallback before descending. |
| Local Farm Arrays loop | You are collecting, scouting, or learning the region | Spending the cycle in optional rooms | Set a turnaround shelter and leave before the rain warning. |
Como ler um mapa de Farm Arrays sem se perder
Start with topology rather than scenery. Find the current entrance, the next shelter, the route that stays on solid platforms, and the final transition. Farm Arrays has enough repeated metal, grass, and open space to make visual memory unreliable. A small list of anchors is easier to use than trying to memorize every room.
On the interactive map, turn on shelters and region connections before collectibles. Then zoom into the next two or three rooms only. This keeps the map useful as a decision tool instead of revealing an entire route that you may not need. Once you know the next shelter and exit, close the map and play the route rather than continuing to browse.
The room-level map is also useful for diagnosing a failed attempt. If you died in the grass, the problem may be exposure rather than direction. If you reached the correct platform but missed a shelter, the issue is a route anchor. If a gate seemed unreachable, check whether the campaign layer changed the practical approach.
Quatro âncoras do mapa
Entrada atual → próximo abrigo → sequência de plataformas mais segura → transição de destino
Shelter first
Shelter icons turn an open region into a sequence of manageable commitments.
Connections second
Use region exits to choose direction, not as a reason to cross every optional room.
Hazards third
Only reveal creature or hazard layers when they change your next movement decision.
Collectibles last
Pearls and optional discoveries are easier to collect after you know how to leave the region.
Conferir as conexões das salas de Farm Arrays no mapa interativo
Worm Grass: o perigo que muda seu plano
Worm Grass is dangerous because it turns an apparently open floor into a movement commitment. The safest response is not to rush blindly across it. Look for a platform edge, pole, overhead route, or creature-assisted crossing that keeps your movement predictable. If you cannot see the other side or a recovery point, treat the patch as a problem to solve rather than ordinary terrain.
A common mistake is entering the grass while still deciding where to go. That creates two risks at once: the creature can pull you down while you are searching for the exit, and the rain timer keeps shrinking while you backtrack. Decide the landing point first, then cross only when the line is clear.
If a direct route repeatedly fails, change the objective for one cycle. Use the interactive map to locate a shelter on the safer side, learn the platform order, and return with a route that has fewer unknowns. Farm Arrays rewards patient repetition more than a single high-risk shortcut.
- Do not enter while undecided: Pick the far platform or shelter before committing to the patch.
- Keep a recovery point: A route is safer when a missed jump still leaves a known ledge or retreat.
- Use the upper line when practical: Height does not guarantee safety, but it can reduce time spent inside the grass.
- Leave optional rooms for later: If the region is already costing cycles, prioritize the connection over a detour.
Rotas com Raindeer e o que fazer quando a montaria falha
Raindeer can make a Farm Arrays crossing feel much shorter, but a ride should be treated as a route option rather than the only plan. Position, timing, and the destination platform all matter. If the animal does not line up with the route you need, forcing the attempt can leave you in a worse position than taking the slower ground path.
Keep the map open long enough to identify where the ride is supposed to leave you. A successful ride that ends beside a hazard is not automatically progress. The useful question is whether the landing point leads to a shelter, a stable platform, or the next transition without another blind crossing.
For Hunter or a late-cycle run, the faster route may be worth the risk when you already know the landing. For a first Survivor or Monk visit, a slower route that teaches the region is often better. The correct answer depends on your campaign goal, not on the map distance alone.
Regra para decidir sobre Raindeer
Pouso conhecido + abrigo alcançável = tente; pouso desconhecido + ciclo avançado = use a alternativa
Before the ride
Identify the target platform, the next shelter, and the retreat if the ride does not line up.
Do not chase forever
If the ride is not cooperating, preserve the cycle and use the platform route you already understand.
Hunter exception
Hunter can justify more risk when the route saves cycles, but only after the landing is known.
Use the fallback
A slower route is still a successful route when it reaches the next shelter with karma intact.
Plano de abrigos: pense em ciclos, não em distância
Farm Arrays is easiest to learn as a sequence of shelter decisions. Before each push, choose the next shelter and decide what kind of cycle you are playing: progress, scouting, food recovery, or collecting. The same map can support all four goals, but mixing them in one crossing makes the route look more complicated than it is.
Use the interactive map to compare shelter spacing rather than measuring a straight line between gates. A short route through Worm Grass may have a higher failure rate than a longer route with clear platforms. If the rain warning begins before the next shelter is realistic, turn around early.
| Cycle goal | First check | Stop condition | Best page support |
|---|---|---|---|
| Progress | Next shelter and destination gate | No safe shelter before the warning | Use the interactive map and route table. |
| Scouting | One unknown platform or connection | You have learned the route anchor | Return and update your mental map. |
| Food recovery | Food source near a safe retreat | Enough food for the next gate or shelter | Avoid optional central crossings. |
| Collecting | Known pearl or item location | The detour costs the next safe cycle | Collect after the main route is stable. |
Diferenças entre campanhas: Survivor, Monk, Hunter e Downpour
A Farm Arrays map is only useful when the selected campaign matches the run. Survivor and Monk players can usually treat the region as a route-learning and connection problem. Hunter has less time to test the region, so the value of a fast crossing is higher. Downpour campaigns may change which route is useful, which creatures matter, and whether Farm Arrays is a destination or a connector.
Do not use a base-game map layer to make a precise claim about a Downpour route. Open the relevant layer, confirm the transition, and then read the guide for the decision that remains the same across campaigns: shelter first, known landing, and a fallback before the rain cue.
If you are lost in a campaign-specific route, the existing Progression Guide is useful for the broad order, while the Farm Arrays page should answer the local questions: which side to enter, where to pause, what hazard changes the route, and when to stop exploring.
Survivor / Monk
Prioritize learning the shelter chain and a reliable platform route before collecting optional items.
Hunter
Plan the fastest known line, but do not trade a known shelter for an untested Raindeer landing late in the run.
Downpour slugcats
Select the correct campaign layer and verify the purpose of the region before following old route memory.
Replay or collecting
Once the route is stable, use the map layers to add pearls, echoes, or optional rooms one at a time.
Use o mapa interativo para conferir salas exatas
The page guide explains the route decisions; the interactive map is the place to confirm exact room connections, shelter positions, region exits, and campaign layers. Start from the region you already recognize, enable shelters and connections, and only then add hazards or collectibles. This keeps the map readable on both desktop and mobile.
For a Farm Arrays question, do not zoom out immediately. Find your entrance, trace the next shelter, inspect the platform or transition that follows, and stop when the next decision is clear. If you are coming from Sky Islands, compare the exposed route with the nearest fallback; if you are returning to Outskirts, confirm the exit direction before dropping into a lower path.
Rotina com poucos spoilers
Escolha a campanha → encontre a entrada → mostre os abrigos → siga uma saída → feche o mapa
Erros comuns no mapa de Farm Arrays
Most Farm Arrays failures come from using a correct map with the wrong objective. A player may know where the next exit is but still lose the cycle by entering Worm Grass late, chasing a Raindeer without a landing plan, or taking a collectible detour before securing a shelter. Reduce the route to one decision at a time and the region becomes much more manageable.
When an attempt fails, write down the exact failure: wrong entrance, wrong platform, no recovery point, bad creature timing, or a campaign-layer mismatch. Then change one variable on the next cycle. Repeating the full crossing with no diagnosis is slower than learning one shelter-to-shelter segment.
- Following the straight line: The shortest visual line can run through the most dangerous grass or leave you without a shelter.
- Entering too late: Open crossings need time for recovery. Start early enough to turn around.
- Treating Raindeer as mandatory: A ride is an option, not proof that the ground route is wrong.
- Using the wrong campaign layer: Check the map version before making a precise route assumption.
- Collecting before stabilizing: Learn the route and shelter chain first; return for optional items later.
FAQ do mapa de Farm Arrays
Referências de mapa e mídia
- Community-sourced Farm Arrays route map used for orientation — Imagem de guia da Steam Community
- Community wiki region and connection background — Rain World Wiki: Farm Arrays
- Exact room connections and campaign layers — Mapa interativo de Rain World
- Broad route order and progression context — Guia de progressão de Rain World
Última atualização: 22 de agosto de 2026