Rain World Survivor Map Guide: Route, Regions & Ending Path
A practical Survivor route guide for reading the map from Outskirts, choosing the right first regions, checking shelters and karma gates, and avoiding common first-campaign detours.

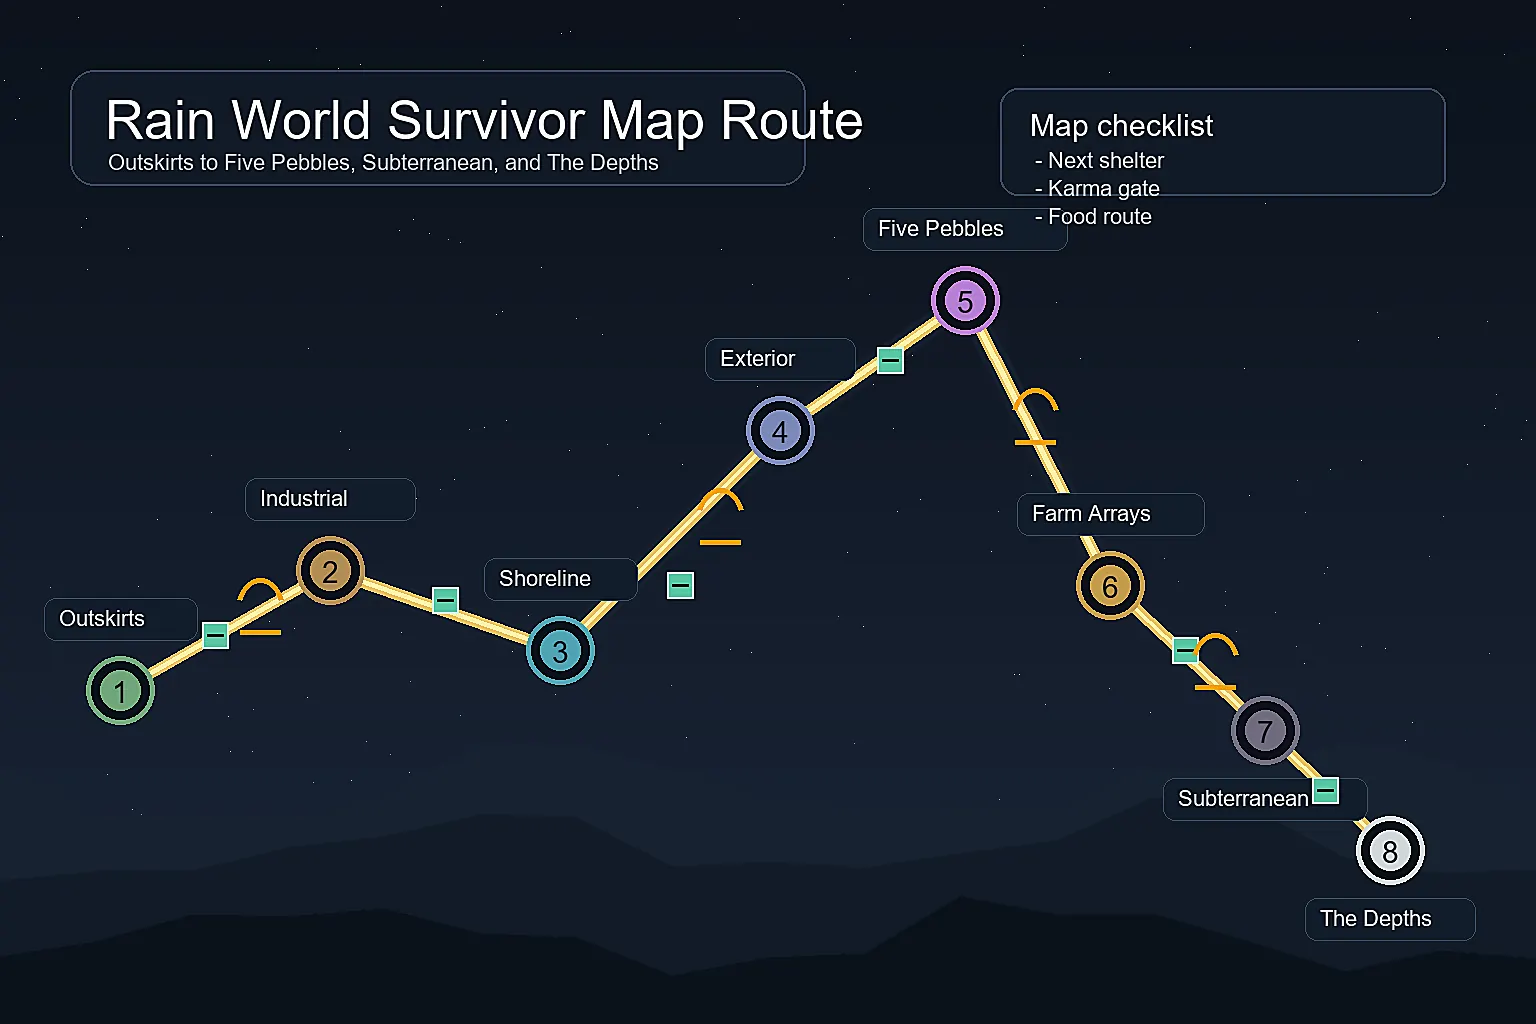
Table of Contents
The Rain World Survivor map is the map most players need before any other campaign-specific route. Survivor starts in Outskirts with standard movement, standard food rules, and very little direct instruction, so the challenge is not only surviving rooms but deciding which region sequence makes sense. This guide gives a spoiler-aware route framework: enough direction to stop you from wandering in circles, but still flexible enough to let Rain World feel like exploration rather than a checklist.
Quick Answer: Best Survivor Route on the Map
For a first Survivor clear, the safest learning route is usually Outskirts -> Industrial Complex -> Garbage Wastes or Shaded Citadel -> Shoreline -> Shaded Citadel or Memory Crypts -> The Exterior -> Five Pebbles -> Chimney Canopy -> Sky Islands -> Farm Arrays -> Subterranean -> The Depths. You can shorten or alter it, but this path introduces movement, water, darkness, vertical climbing, karma gates, and final descent pacing in an order that makes sense for a new player.
Recommended first Survivor route
Outskirts -> Industrial Complex -> Garbage Wastes/Shaded Citadel -> Shoreline -> The Exterior -> Five Pebbles -> Chimney Canopy -> Sky Islands -> Farm Arrays -> Subterranean -> The Depths
Before entering a new region, open the interactive map and check three things: the nearest shelter after the gate, the next likely exit, and whether your current karma can survive a death or two. If one of those answers is unclear, spend a cycle scouting rather than forcing a long crossing.
How to Read the Rain World Survivor Map
Read the map as a chain of decisions, not as a complete world atlas. Survivor begins in Outskirts, which connects to Industrial Complex, Drainage System, Farm Arrays, and Downpour-related routes. The useful first question is not 'where can I go?' but 'which gate teaches the next skill without trapping me too far from food and shelter?'
Toggle shelters, gates, region exits, and creature pressure before looking at individual rooms. A route that looks short on a full map may be brutal if it crosses dark rooms, vertical climbs, water tunnels, or food-poor areas before the next shelter.
Start from the gate, not the region name
Two entrances into the same region can create very different routes. Check which side of Industrial Complex, Shaded Citadel, or Subterranean the gate actually places you on.
Use shelters as milestones
A shelter reached with food is real progress. Treat each shelter as a save point for the next map decision rather than trying to cross three regions in one cycle.
Separate learning from finishing
A first Survivor run benefits from learning Shoreline, Looks to the Moon, and The Exterior, even if a faster route technically exists.
Check karma before committing
Map knowledge does not help if a karma gate blocks you after a hard cycle. If karma is low, plan recovery near a known shelter and food source.
Survivor Map Keyword Boundary
Survivor searches often mix first-route help with full-map discovery. This page should answer the first-campaign route, while the homepage owns broad interactive map intent and later DLC pages own campaign-specific variants.
| Candidate query | Current page fit | Action |
|---|---|---|
| rain world survivor map | Exact first-campaign route intent. | Use in metadata, quick answer, route table, and FAQ. |
| rain world map survivor | Same intent with map-first phrasing. | Use as a supporting internal-link anchor. |
| rain world outskirts map | Early-region support intent within a Survivor route. | Add support copy in the route table and FAQ, not a separate page here. |
| rain world interactive map | Broad tool intent owned by the homepage. | Link to the map tool only; avoid retargeting this article. |
Survivor Route Table
Use this table as a practical map-reading checklist. The exact rooms change with your route, but the decision points stay the same.
| Step | Region | Purpose | Map check | Warning |
|---|---|---|---|---|
| 1 | Outskirts | Learn movement, predator avoidance, food, rain timing, and the first gate choices. | Find two nearby shelters and the Industrial Complex gate. | Leaving too early can make the next region feel harder than it needs to be. |
| 2 | Industrial Complex | Introduce denser rooms, scavengers, lizards, and several onward routes. | Choose whether you are aiming for Garbage Wastes, Shaded Citadel, or Chimney Canopy. | Do not wander until rain starts; this region rewards planned shelter hops. |
| 3 | Garbage Wastes or Shaded Citadel | Move toward Shoreline or the darker mid-game route while learning environmental hazards. | Check food, water, and light needs before entering deep rooms. | Shaded Citadel is punishing without light; Garbage Wastes can punish careless water routes. |
| 4 | Shoreline and Looks to the Moon | Stabilize the mid-game route and understand why the world is pointing you east. | Mark shelters near water and the route back toward Shaded Citadel or Memory Crypts. | Water rooms can waste a full cycle if you do not know the nearest safe exit. |
| 5 | The Exterior and Five Pebbles | Reach the major progression beat and unlock clearer direction for the ending route. | Trace vertical climbs, shelters, and the safest path through The Wall or Underhang. | This is where vague map reading becomes costly; scout one shelter at a time. |
| 6 | Farm Arrays, Subterranean, The Depths | Convert the late-game direction into the final descent. | Confirm karma, food, shelter chain, and the Filtration System path. | Do not enter Subterranean as a blind side trip unless you know how to leave. |
For exact room layouts, open the interactive Rain World map
Which Survivor Route Should You Choose?
Survivor has more than one valid map route. Pick the route that matches your experience level and your reason for playing the campaign.
| Route | Best for | Tradeoff | Map focus |
|---|---|---|---|
| Beginner scenic route | First clear, learning the world, meeting major story locations. | Longer and slower, but teaches more regions safely. | Shelters, Shoreline access, Shaded Citadel light route, The Exterior climb. |
| Direct route | Players who already know movement and want to unlock later content faster. | Shorter but mechanically harsher, especially around vertical routes and late-game pressure. | Fast Industrial Complex exit, Chimney Canopy or Wall route, fewer detours. |
| Exploration route | Players who want echoes, side regions, and a fuller understanding of the map. | Easy to lose direction unless you define a return path before each detour. | Echo locations, alternate gates, food loops, return shelters. |
| Downpour return-home route | Players with Downpour who want to understand how Outer Expanse changes the campaign goal. | Requires knowing what content is unlocked and may spoil later campaign context. | Outskirts, Farm Arrays, Subterranean, Outer Expanse links. |
Shelter, Food, and Karma Plan for Survivor
The map is most useful when it supports cycle planning. Use this routine before every serious region transition.
- Start each cycle with one reachable shelter target: If you do not know the next shelter, spend the cycle scouting rather than trying to force a gate.
- Check food before checking exits: A visible gate is not useful if you cannot hibernate after reaching it. Mark food rooms near both sides of important gates.
- Keep one simple escape tool: A rock, spear, or route back to a pipe often matters more than memorizing every room on the map.
- Recover karma near known rooms: When karma drops, return to a reliable shelter and food loop. Trying to regain karma in unknown territory creates repeated deaths.
- Use the map after death: After a failed cycle, identify where the route broke: bad food planning, wrong gate, no shelter, or a room you should bypass next time.
Common Survivor Map Mistakes
- Treating every visible gate as progress: Some gates are valid but unhelpful for your current goal. A good route moves you toward a shelter chain and a larger objective.
- Ignoring the return path: If a region becomes too hard, you need to know how to retreat. Mark the entrance side and the nearest safe room before going deeper.
- Using a full map without context: A full Rain World map can spoil and overwhelm. Focus on your current region, next gate, and one future region at a time.
- Entering dark regions unprepared: Shaded Citadel and late underground areas are much easier when you plan light, shelters, and food before committing.
- Assuming Survivor and Monk routes are identical in practice: They share a broad map pattern, but Survivor has less forgiveness. Plan each transition with fewer mistakes available.
Final Advice for Using the Survivor Map
The best Rain World Survivor map route is not a single perfect line. It is a set of informed decisions: where to sleep, which gate to use, when to scout, and when to stop pushing because karma or food is wrong.
Use the interactive map as a planning layer, not as a replacement for learning the world. Check shelters, gates, and exits, then return to the game with one clear objective for the next cycle.
FAQ: Rain World Survivor Map
References and Further Reading
- Rain World region connections and campaign geography - Rain World Regions
- Outskirts starting-region reference for Survivor routing - Outskirts
- Use this page with the broader progression guide for route context - Rain World Progression Guide
Last updated: July 4, 2026