
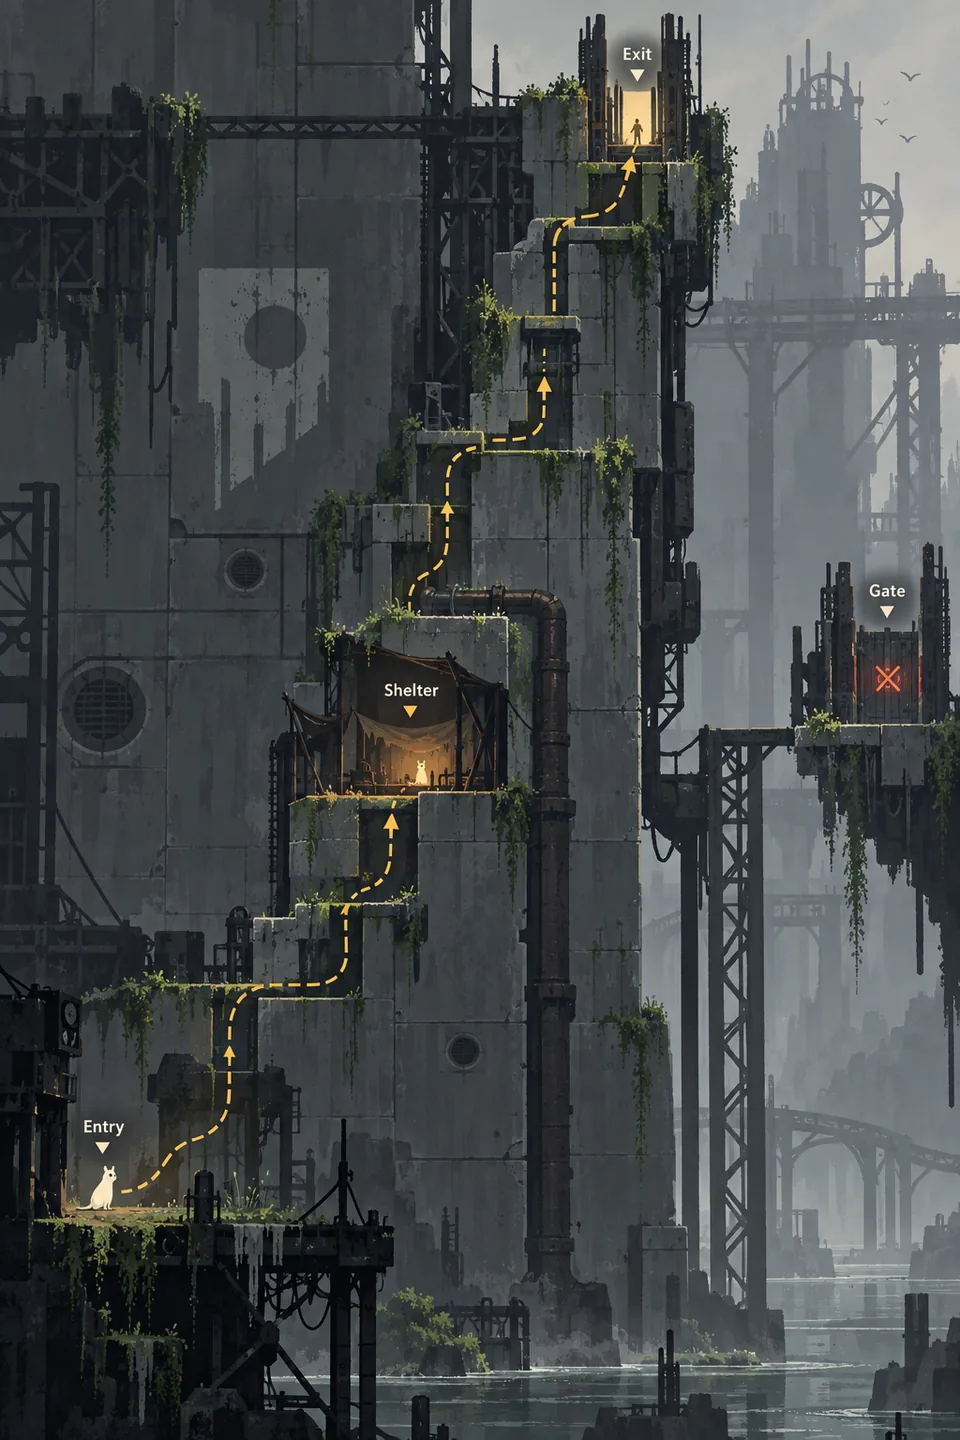
The Rain World The Wall map is most useful when it answers a small, urgent question: can you reach the next shelter, gate, or exit before the cycle turns dangerous? The region rewards careful vertical planning, because a route that looks short on a world view can hide difficult climbs, exposed crossings, or a return trip that is harder than the push forward. This spoiler-light guide explains how to read the region and turn the map into a flexible plan. The diagrams are editorial aids, not exact room maps. For room connections, shelter markers, and campaign-specific routes, open the interactive map and select the save or slugcat you are actually playing.
What a Rain World The Wall map should answer
A useful The Wall map should show more than a region name. It should help you identify the entrance you are using, the next realistic shelter, the vertical section between them, and the exit or gate that gives the trip a purpose. Optional collectibles and lore markers matter only after the basic crossing is understood. A map that puts every symbol on screen at once can make a simple route look impossible, so begin with connections and stopping points.
The Wall is also a planning problem rather than a single universal walkthrough. Your slugcat, campaign, version, entry direction, food state, and current goal can change which branch is sensible. Use the page to decide what to inspect first, then verify the actual rooms in the matching interactive layer. Treat a broad route diagram as a decision aid, not a promise that every save uses the same sequence.
How to read the Rain World The Wall map
Start with the region boundary and your current room. Trace one connection upward or across, then stop and locate the next shelter before following another branch. This prevents the familiar mistake of studying the exit first and discovering too late that the climb has no safe pause. If the interactive map offers filters, leave item and lore markers off until the route itself is clear.
Next, compare elevation changes and narrow passages. A vertical map can make two points look close even when they require several jumps, pipes, or timing checks. Mark the section that can end the cycle, the section that can be reversed, and the point where you can still turn back without crossing a gate. Then inspect hazards and creatures around that small segment instead of scanning the entire region.
- Connections: Find your current room and trace one candidate branch.
- Shelters: Mark the next sleep point and one fallback route.
- Gate: Check the requirement and campaign layer before committing.
- Optional markers: Add items or lore only after the route has a clear purpose.
Plan a The Wall route one cycle at a time
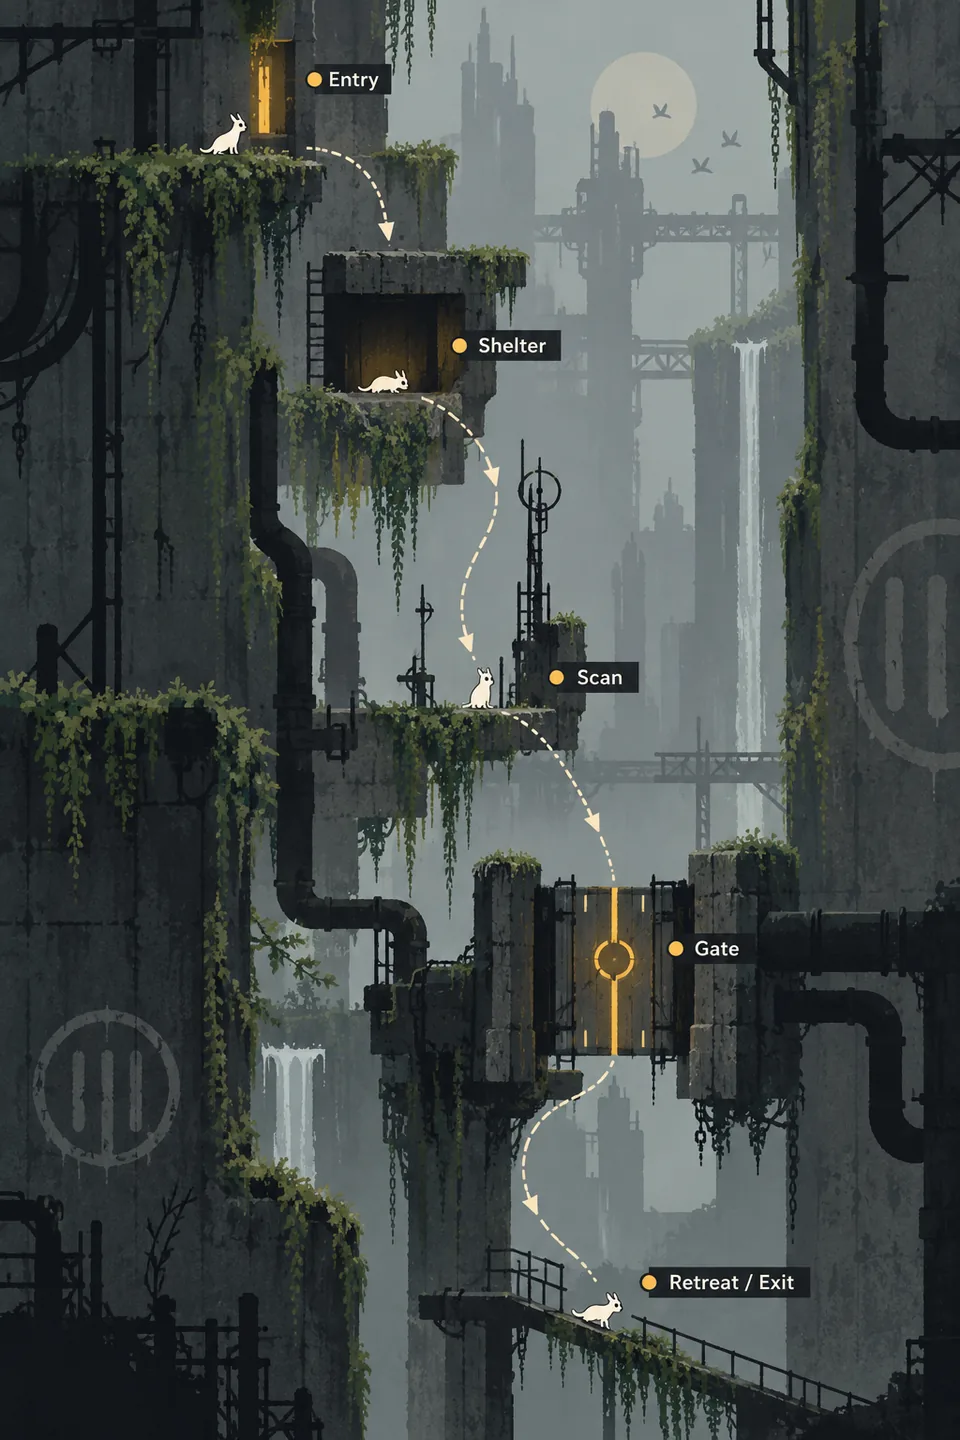
Choose one objective for the next cycle: reach a shelter, scout the next vertical section, confirm an exit, or collect one specific item. A single objective makes the retreat decision obvious. If the plan requires several uncertain jumps before the next shelter, split it into a scouting cycle and a travel cycle. Learning the shape of a climb is progress even when you turn around.
Before leaving, check food, weather pressure, the route back, and the amount of screen space you need for a jump. The map cannot remove those risks, but it can show whether a safer branch exists. Put the next shelter on the map first, then place the goal beyond it. This order keeps an attractive upper marker from pulling you across an untested section.
The route-plan illustration turns the decision into five checkpoints: enter, shelter, scan, gate, and retreat or exit. Use the sequence as a checklist. If the scan reveals a blocked pipe, unfamiliar room, or missing requirement, retreat while the route is still legible and update the next attempt.
- Set a stop: Name the next shelter or a verified return point.
- Check the cost: Account for food, jumps, hazards, and gate conditions.
- Commit once: Push toward one objective and postpone unrelated markers.
- Leave a retreat: Keep a known path back until the exit is confirmed.
Use The Wall shelters as route anchors
A shelter divides The Wall into attempts you can understand and repeat. Find the shelter beyond the next hard section, then work backward to the jumps and pipes that lead to it. On the map, compare the approach with the return path. A slightly longer route can be better when it gives you more room to recover or keeps the next decision visible.
Do not assume the closest shelter is always the best anchor. The useful shelter is the one that supports your actual objective and leaves a sensible exit. If the next shelter is below a dangerous climb, mark a temporary stopping point and scout the climb before carrying a full plan through it. The map should make the stopping decision explicit, not merely show distance.
Check The Wall gates and exits
A gate or region exit is a route decision, not just a destination marker. Before leaving a shelter, inspect the requirement, the current karma shown by the game, and the nearest safe stopping point on the other side. If you cannot meet the condition, the gate can still serve as a landmark, but it should not be the only plan for the cycle.
Use the interactive map to compare every visible exit with the campaign layer you selected. A world overview can combine routes that are not simultaneously open in every campaign. If the route is available but the approach is risky, plan the gate as a two-cycle objective: first learn the rooms and retreat, then return with the food and requirement ready.
Match the map to your slugcat and campaign
The right The Wall map view depends on the campaign in your save. Survivor and Monk may make the region feel like a progression crossing, while Hunter, Spearmaster, Artificer, Saint, or Watcher can change the goal, pressure, or relevant connections. A general region label is not enough to prove that a room or gate is usable for every slugcat.
Select the active campaign before you compare markers. Then decide whether you need shelters and exits only, or whether a pearl, Echo, creature, or lore marker supports the current objective. If a marker appears in one layer but not another, record that difference instead of assuming the map is missing data.
Manage The Wall's vertical hazards
The Wall's vertical shape changes how you read danger. A long climb can hide a bad landing, a blind fall, or a passage where creatures have the advantage. On the map, mark the first point where you can safely pause and the last point where you can turn back. Those two markers are more useful than a broad statement that the region is difficult.
Break a hard section into visible tests: can you reach the ledge, can you wait safely, can you cross the next gap, and can you return if the timing fails? Carrying food or a useful item does not make an unknown jump safe. If the map shows an alternate pipe or lower route, compare the number of decisions rather than the apparent height.
Recover when a The Wall route stops making sense
If you are lost, stop adding objectives. Identify one room, pipe, silhouette, or shelter you recognize, then trace the nearest known connection backward. A wrong campaign layer can make a correct route look absent, so check the selected slugcat before assuming the map or game disagrees.
If the game and map still appear different, trust what is accessible in the current run and note the exact point of disagreement. Check whether the connection is a gate, a one-way transition, a campaign-specific route, or simply a room you have not reached from the side you expected. This note turns a vague failure into a targeted map check.
Rain World The Wall map FAQ
Map references
- Room connections, shelters, gates, and campaign layers - Rain World Interactive Map
- Community-maintained region reference - Rain World Wiki: The Wall
- Official game and expansion context - Rain World on Steam
Last updated: October 12, 2026
Open the interactive Rain World map